Battery switch on travel trailer function is crucial for managing your RV’s power. Understanding how to use your battery switch safely and effectively is key to enjoying worry-free camping. This guide breaks down the different types of switches, how to connect and disconnect your batteries, troubleshooting common issues, and essential maintenance tips. We’ll cover everything from basic operation to more advanced topics like electrical system integration and choosing the right switch for your needs.
Get ready to become a battery switch pro!
We’ll explore the various types of battery switches—single, dual, and selector—and detail their functionalities. Learn the proper procedures for connecting and disconnecting your batteries, emphasizing safety precautions. We’ll delve into troubleshooting common problems, offering practical solutions and preventative maintenance strategies. By the end, you’ll confidently manage your travel trailer’s power system.
Understanding Battery Switch Functionality in Travel Trailers
Your travel trailer’s battery switch is a crucial component, acting as the central control for your trailer’s electrical system. It allows you to easily disconnect your house batteries from the rest of the system, preventing battery drain when the trailer is not in use and protecting against potential electrical issues. Understanding its operation is key to maintaining your trailer’s electrical system and preventing costly repairs.
Okay, so you’re dealing with your travel trailer’s battery, right? Knowing how to use the battery switch is crucial. Check out this helpful guide on the battery switch on travel trailer function to understand the basics. It’s super important to learn how to properly manage your power, especially if you’re planning a longer trip. Understanding the function of the switch prevents draining your battery and leaving you stranded.
For more in-depth info, including troubleshooting tips, another great resource is this article on the battery switch on travel trailer function ; it’s got some handy diagrams too!
Battery Switch Types
Travel trailers typically utilize one of three main types of battery switches: single, dual, and selector switches. A single battery switch is the simplest, providing a single on/off function for a single battery bank. Dual battery switches manage two separate battery banks, usually a deep-cycle house battery and a starting battery for the tow vehicle. Selector switches offer more control, allowing you to choose between different power sources (like shore power, generator, or batteries) or to isolate individual battery banks.
Operating a Typical Battery Switch
Proper operation of your battery switch is straightforward but vital. Most switches use a rotary dial or lever mechanism. Before operating the switch, always consult your trailer’s owner’s manual for specific instructions and diagrams as the exact operation can vary slightly. Generally, the positions will include an “Off” position (completely disconnecting the batteries), a “Both” or “On” position (connecting both batteries in parallel), and possibly separate positions for each individual battery bank.
- Identify the switch: Locate the battery switch, usually found near the battery compartment or inside a control panel.
- Determine the switch positions: Familiarize yourself with the switch’s positions – “Off,” “Both,” and any individual battery bank selections.
- Turn the switch to the desired position: Carefully rotate or move the switch lever to the desired position. If you are storing your trailer for an extended period, turn the switch to “Off” to prevent battery drain. For normal use, select “Both” or the appropriate battery bank.
- Verify functionality: After changing the switch position, check your trailer’s electrical systems to ensure the power is working correctly. Test lights, appliances, and other systems to verify the battery switch is functioning as intended.
Diagram of a Typical Battery Switch Setup
Imagine a simple diagram. It shows two batteries (Battery 1 and Battery 2) connected to a three-position rotary switch. The switch has three positions: OFF, BOTH, and BATTERY 1. From the switch, a single wire leads to the trailer’s electrical system.When the switch is in the “OFF” position, the circuit is completely broken, isolating both batteries from the trailer’s electrical system.In the “BOTH” position, the circuit connects both Battery 1 and Battery 2 in parallel to the trailer’s system.
This allows both batteries to supply power.In the “BATTERY 1” position, only Battery 1 is connected to the trailer’s system. Battery 2 is isolated. A similar setup exists for a “BATTERY 2” position if the switch supports it. This allows for selective use of batteries, for instance, preserving one battery for essential functions while using another for other needs.
Connecting and Disconnecting Batteries
Connecting and disconnecting your travel trailer’s battery to the truck’s chassis battery is a crucial task for managing power and preventing issues. This process involves understanding your specific setup and taking appropriate safety measures. Improper handling can lead to damage or injury, so careful attention to detail is essential.Connecting and disconnecting your batteries involves using the battery switch, typically located near the batteries themselves.
This switch controls the flow of electricity between your trailer’s battery and the truck’s battery, allowing you to charge the trailer battery while driving or isolate it to prevent drain.
Battery Connection and Disconnection Procedure
First, locate your battery switch. It’s usually a three-position switch (OFF, BATTERY, BOTH) or a similar configuration. Before making any connections, always ensure the battery switch is in the OFF position. This prevents accidental shorts or electrical shocks. Next, carefully inspect the battery terminals for any corrosion or loose connections.
Clean the terminals with a wire brush and baking soda solution if necessary. Once clean and dry, connect the positive (+) cable to the positive terminal and the negative (-) cable to the negative terminal. Secure all connections tightly. To disconnect, simply reverse this process, ensuring the switch is in the OFF position before disconnecting any cables.
Maintaining Battery Connections
Regular maintenance is key to preventing corrosion and ensuring reliable battery performance. Apply a battery terminal protector (a grease-like substance specifically designed for this purpose) to the terminals after cleaning. This helps repel moisture and prevent corrosion. Visually inspect the connections regularly for any signs of corrosion, looseness, or damage. Addressing any issues promptly will prevent more significant problems down the road.
Consider using anti-corrosion washers under the nuts to further improve connection quality.
Safety Precautions When Working with RV Batteries
RV batteries contain corrosive chemicals and can produce explosive hydrogen gas. Always wear appropriate safety glasses to protect your eyes from splashes of battery acid. Work in a well-ventilated area to prevent the buildup of hydrogen gas. Never smoke or use open flames near batteries. If you encounter any spills, neutralize the acid immediately with baking soda and water.
Wear gloves to protect your hands from corrosive chemicals. Always disconnect the negative (-) terminal first when disconnecting a battery and connect it last when reconnecting.
Comparison of Battery Connection Methods, Battery switch on travel trailer function
| Connection Method | Pros | Cons | Suitability |
|---|---|---|---|
| Direct Wiring | Simple, reliable if done correctly | Requires knowledge of electrical systems; risk of improper wiring | Experienced users; permanent installations |
| Battery Switch | Easy to isolate batteries; safe operation | Additional cost; potential for switch failure | Most RV owners; convenient control |
| Quick Disconnect Terminals | Easy connection/disconnection; corrosion resistant | Higher initial cost; potential for failure if not high quality | Users who frequently connect/disconnect; convenient |
| Anderson Powerpole Connectors | High current carrying capacity; reliable connection | Requires specialized connectors; can be expensive | High-current applications; users valuing reliability |
Troubleshooting Common Battery Switch Issues
Your travel trailer’s battery switch is a crucial component, and problems with it can leave you stranded. Understanding common issues and how to troubleshoot them will save you time and frustration. This section will guide you through identifying and resolving some of the most frequent problems.
Identifying Common Battery Switch Problems
Several issues can arise with your travel trailer’s battery switch. The most common include a complete lack of power to the trailer, blown fuses in the battery switch’s circuitry, or the switch itself failing to properly connect or disconnect the batteries. A clicking sound from the switch when attempting to turn it on could indicate a problem with the switch’s internal mechanism or a low battery voltage.
Another common issue is low battery voltage, which can manifest in various ways, from dim lights to complete power failure.
Resolving Battery Switch Malfunctions
If your battery switch isn’t working correctly, the first step is to check the fuses. Locate the fuse box (often near the battery switch) and inspect the fuses for any that are blown. A blown fuse will appear visibly damaged – often with a broken filament visible inside the glass. Replace any blown fuses with fuses of the same amperage rating.
If the problem persists after replacing fuses, carefully inspect the switch itself for any signs of damage or corrosion. Loose connections at the battery terminals or within the switch’s wiring are also common culprits. Tighten any loose connections and clean any corroded terminals with a wire brush. If the switch still fails to operate, it may need replacement.
Consult your trailer’s manual for specific instructions or seek professional assistance.
Diagnosing Low Battery Voltage
Low battery voltage can stem from several sources. A simple way to start is by checking the voltage directly at the battery terminals using a multimeter. A reading significantly below 12.6 volts (for a 12-volt system) indicates a problem. This low voltage could be due to a parasitic drain (a device constantly drawing power even when the trailer is off), a faulty charging system (either from your tow vehicle or solar panels), or simply old and failing batteries.
To identify a parasitic drain, disconnect the negative battery terminal and use the multimeter to measure the voltage drop across the terminals. If the voltage continues to drop, there’s a parasitic draw somewhere in your system, and you may need a professional to locate the source. Testing the charging system involves measuring the voltage at the battery terminals while the charging system is active.
A low reading indicates a problem with the charging system, which may require repair or replacement. Finally, if the batteries are old, they may simply need replacement.
Troubleshooting Flowchart
The following flowchart Artikels a systematic approach to troubleshooting battery switch issues:
| Problem | Troubleshooting Steps |
|---|---|
| No Power to Trailer | 1. Check Battery Switch Position 2. Check Fuses 3. Check Battery Voltage 4. Inspect Wiring for Loose Connections or Corrosion 5. Check Battery Condition 6. Check Charging System |
| Battery Switch Not Functioning | 1. Check Fuses 2. Inspect Switch for Damage or Corrosion 3. Tighten Connections 4. Test Switch Continuity (using a multimeter) 5. Replace Switch (if necessary) |
| Low Battery Voltage | 1. Measure Battery Voltage 2. Check for Parasitic Drain 3. Test Charging System 4. Assess Battery Condition 5. Consider Battery Age |
Battery Switch and Electrical System Integration
Your travel trailer’s battery switch acts as the central control for your DC power system, coordinating power flow from various sources and to various appliances. Understanding its interaction with the rest of your electrical system is crucial for safe and efficient RV operation. It’s more than just an on/off switch; it’s a critical component in managing power distribution.The battery switch interacts with your trailer’s electrical components by selectively connecting or disconnecting your house batteries from the rest of the system.
When the switch is in the “on” position, power from your batteries flows to various 12-volt appliances like lights, water pumps, and fans. When in the “off” position, this power flow is interrupted, preventing battery drain when the trailer isn’t in use. This is especially important to prevent complete battery discharge during storage. The switch also plays a vital role in managing power from external sources.
Shore Power and Generator Integration
With the battery switch in the “on” position, shore power (from a campground hookup) or generator power typically charges your house batteries through a charging system (often an integrated converter/charger). This charging system regulates the voltage and current to prevent overcharging. However, even with shore or generator power connected, the battery switch controls whether or not those batteries can power the 12V systems in the RV.
If the switch is off, the 12V systems will be powered solely by the external source, if available. If the switch is on, the 12V systems will draw power from the batteriesfirst*, supplemented by the external source if needed (or charged by it). If the external source is not available and the switch is on, the 12V systems will be powered solely by the batteries until they are depleted.
Impact on Appliances and Systems
The battery switch directly affects the operation of all 12-volt DC appliances and systems in your travel trailer. Turning the switch off disconnects the house batteries from these appliances, preventing accidental drain. This includes interior and exterior lights, water pumps, fans, and other DC-powered devices. Larger appliances, like air conditioners and refrigerators (often running on 120V AC), are usually not directly affected by the battery switch, as they draw power from the converter/charger or directly from shore/generator power.
However, some refrigerators may have a 12V DC mode for operation when not connected to shore power, in which case the battery switch would control that functionality.
Multimeter Voltage Testing
A multimeter is an invaluable tool for diagnosing electrical issues in your RV. To test voltage at different points in your system, first, ensure the multimeter is set to the appropriate DC voltage range (typically 20V). Then, carefully probe the positive (+) lead to the positive terminal of your battery, and the negative (-) lead to the negative terminal.
You should see a voltage reading close to 12.6V if the battery is fully charged. Next, with the battery switch “on,” check the voltage at the terminals of various appliances or circuits. Significant voltage drops indicate potential wiring problems or faulty components. For example, if you measure a low voltage at a light fixture while the battery switch is on, it could indicate a loose connection, a blown fuse, or a problem with the light itself.
Remember to always exercise caution when working with electricity.
Battery Switch Maintenance and Upkeep
Keeping your travel trailer’s battery switch in good working order is crucial for reliable power. Neglecting maintenance can lead to frustrating breakdowns and potentially damage other electrical components. A simple preventative maintenance schedule and occasional cleaning can save you significant headaches down the road.Regular inspection and proactive maintenance are key to extending the lifespan of your battery switch and ensuring the safe and efficient operation of your trailer’s electrical system.
Okay, so you’re wondering about your travel trailer’s battery, right? Understanding how the battery switch works is key. Check out this helpful guide on the battery switch on travel trailer function to get a good grasp of the basics. Then, if you want a slightly different perspective or more detailed explanation, dive into this other resource about the battery switch on travel trailer function.
Knowing how to properly manage your battery power is crucial for a smooth and enjoyable camping trip!
This involves more than just occasional checks; it requires a planned approach to ensure all components are functioning correctly.
Preventative Maintenance Schedule
A preventative maintenance schedule should be integrated into your regular pre-trip and post-trip checklists. This ensures consistent attention to detail. Aim for a thorough inspection every six months, or more frequently if you use your trailer extensively in harsh conditions (extreme heat, cold, or dampness). This schedule includes checking the switch itself, its connections, and the battery terminals.
During each inspection, visually check for corrosion, loose connections, or any signs of damage. Tighten any loose connections and clean any corrosion as needed. Consider a yearly professional inspection if you are uncomfortable performing these checks yourself.
Battery Terminal and Connection Cleaning
Clean battery terminals and connections are essential for optimal power transfer and to prevent corrosion buildup. Corrosion creates resistance, reducing the flow of electricity and potentially leading to overheating or failure of components. To clean terminals, first disconnect the negative cable (always disconnect the negative first!), then use a wire brush or a terminal cleaning tool to remove any corrosion.
A baking soda and water paste can also be effective for cleaning stubborn corrosion. After cleaning, apply a thin layer of anti-corrosion grease or terminal protector to prevent future corrosion. Remember to reconnect the negative cable last.
Replacing a Faulty Battery Switch
Replacing a faulty battery switch is a relatively straightforward process, but requires some basic electrical knowledge. Before starting, always disconnect the negative battery cable to prevent accidental shocks. The specific steps will vary slightly depending on the type of switch you have, but generally involve removing the old switch from its mounting location, noting the wiring configuration before disconnecting the wires, installing the new switch in the same location, and carefully reconnecting the wires according to the previous configuration.
It is crucial to consult your trailer’s wiring diagram or the instructions for your specific battery switch to ensure correct installation. If you are unsure about any step, consult a qualified electrician.
Common Spare Parts to Keep on Hand
Having some common spare parts on hand can save you time and frustration if a repair is needed while on the road. A proactive approach to spare parts minimizes downtime and ensures smooth operation.
- Spare battery switch (same type and amperage as your current switch)
- Assortment of battery terminal connectors
- Wire connectors (various sizes)
- Wire brush or terminal cleaning tool
- Anti-corrosion grease or terminal protector
- Electrical tape
- Fuse(s) – matching the amperage of your system
Battery Switch Selection and Installation: Battery Switch On Travel Trailer Function
Choosing and installing the right battery switch is crucial for the safe and efficient operation of your travel trailer’s electrical system. A poorly chosen or incorrectly installed switch can lead to power failures, damage to your batteries, or even fire hazards. This section will guide you through the process of selecting and installing a suitable battery switch.
Types of Battery Switches and Their Features
Several types of battery switches are available for travel trailers, each with its own set of advantages and disadvantages. The most common types include manual switches, remote switches, and automatic switching systems. Manual switches are the simplest and most affordable, requiring you to physically flip a switch to connect or disconnect batteries. Remote switches offer convenience by allowing you to control the switch from a location inside your trailer.
Automatic switching systems automatically connect and disconnect batteries based on voltage levels or other pre-set parameters, but they are typically the most expensive. Consider factors like your budget, technical skills, and desired level of convenience when making your selection. For example, a simple manual switch might be sufficient for a smaller trailer with fewer power demands, while a remote switch would be more practical for a larger trailer.
Automatic systems are often seen in high-end trailers where ease of use and sophisticated power management are prioritized.
Selecting the Correct Amperage Rating
The amperage rating of your battery switch must be equal to or greater than the maximum current your batteries and electrical system can draw. Choosing a switch with an insufficient amperage rating can lead to overheating and potential fire hazards. To determine the correct amperage rating, you need to consider the total amperage draw of all devices connected to the battery system.
For instance, if your combined appliances, lights, and other loads draw a maximum of 100 amps, you need a battery switch rated for at least 100 amps, ideally higher to provide a safety margin. Consult your trailer’s electrical system documentation or a qualified electrician if you’re unsure about the maximum amperage draw. Underestimating this requirement can result in a significant safety risk.
Installing a Battery Switch
Installing a new battery switch requires basic electrical knowledge and tools. Improper installation can result in electrical malfunctions or safety hazards. Always disconnect the batteries before beginning any work. The installation process generally involves mounting the switch securely in a convenient and accessible location, usually near the batteries. Then, you need to connect the positive (+) and negative (-) battery cables to the switch according to the manufacturer’s instructions.
It is essential to use appropriately sized wiring and connectors to ensure a secure and safe connection. Finally, always double-check all connections before reconnecting the batteries and testing the system. Refer to your chosen battery switch’s specific installation manual for detailed guidance.
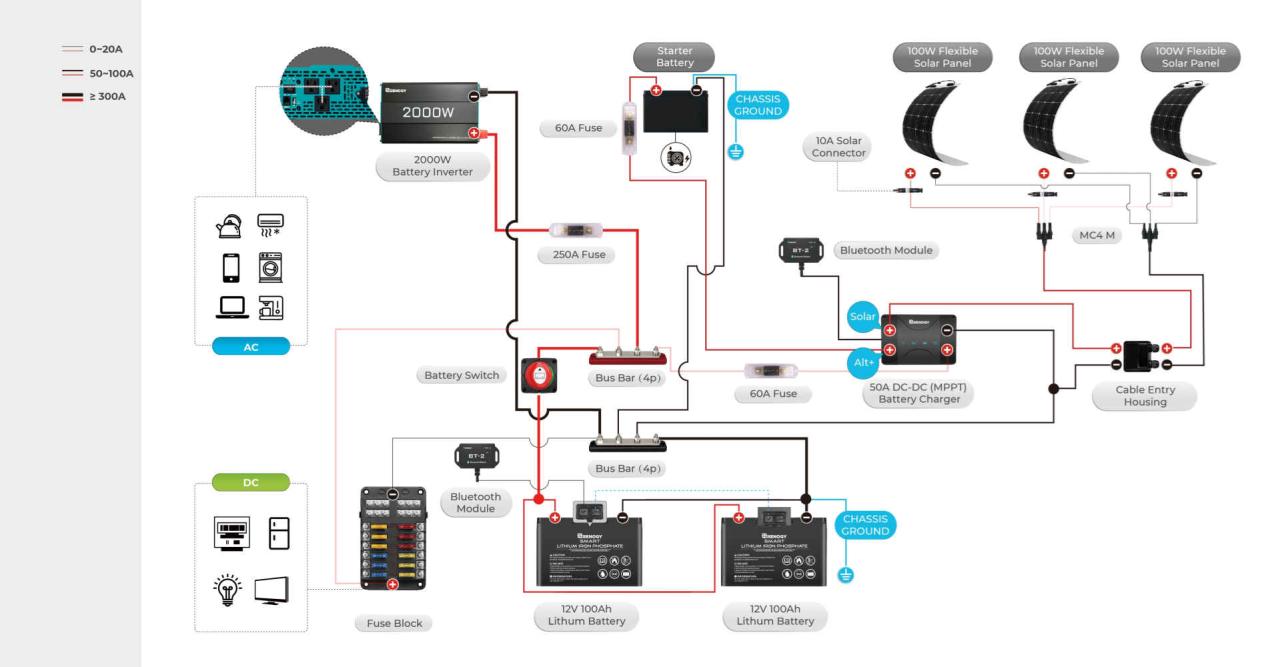
Visual Guide to Battery Switch Wiring
Illustration 1: Switch Placement and Battery Connections
This illustration shows a battery switch mounted on a wall near the batteries. Two heavy-gauge cables (positive and negative) from each battery are shown connecting to the switch’s terminals. Clearly labeled positive (+) and negative (-) terminals on the switch are visible. The cables are secured with appropriate connectors, such as ring terminals crimped onto the cable ends.
A diagram clearly shows the flow of current from the batteries, through the switch, and to the trailer’s electrical system. The switch itself is depicted with clear markings indicating the “ON” and “OFF” positions.
Illustration 2: Wiring to the Trailer’s Electrical System
This illustration demonstrates how the output terminals of the battery switch connect to the main power distribution panel of the travel trailer. Heavy-gauge wires run from the switch’s output terminals to the main breaker panel. Each wire is clearly labeled and secured with appropriate connectors. The illustration also shows a fuse or circuit breaker integrated into the wiring for additional safety, protecting the system from overcurrent.
The diagram clearly shows the connection points on the distribution panel and the flow of current from the switch to the various circuits in the trailer.
Illustration 3: Grounding Connection
This illustration highlights the importance of a proper grounding connection. A heavy-gauge ground wire is shown connecting the negative (-) terminal of the battery switch to a solid ground point on the trailer’s chassis. This ensures a complete circuit and prevents voltage buildup that could cause damage or hazards. The illustration clearly depicts the secure connection of the ground wire to both the switch and the chassis, emphasizing the importance of a clean and corrosion-free connection.
Mastering your travel trailer’s battery switch is a vital skill for any RV owner. From understanding its basic function to performing routine maintenance, this guide equips you with the knowledge to prevent power-related problems and ensure a smooth and enjoyable camping experience. Remember to prioritize safety when working with batteries and consult a professional if you encounter complex issues.
Happy travels!
User Queries
What happens if I leave my battery switch on all the time?
Leaving your battery switch on constantly can drain your batteries, especially if you’re not connected to shore power. This can lead to dead batteries and potential damage to your RV’s electrical system.
How often should I check my battery terminals?
Inspect your battery terminals at least every three months for corrosion. Clean them as needed to maintain good electrical connections.
What size fuse should I use with my battery switch?
The appropriate fuse size depends on the amperage rating of your battery switch and the electrical system. Consult your RV’s wiring diagram or a qualified electrician for the correct size.
Can I use a battery switch from a different RV in my travel trailer?
While it might seem possible, it’s generally not recommended. Different RVs have different electrical systems, and using an incompatible switch can be dangerous. Always use a switch with the correct amperage rating for your system.
